Beyond my personal use, I have realized several ways VR and 3D VR Video can play a role in engaging students remotely from home, like:
- Help students better understand training equipment they will ultimately use when they come back on site.
- Allow teachers to better demonstrate a concept when standard video is not enough.
- Give students the opportunity to virtually “tour” facilities that they otherwise cannot. This is especially beneficial for:
- Helping students transition from one school to another (i.e. middle school to high school) who have never been inside a particular lab they are expected to remotely learn in
- Creating a sense of connectedness for students new to a program who have not yet had the opportunity to experience true hands-on learning within that program
- Virtual field trips to manufacturing facilities and other sites that exemplify real-world learning
I put together a few videos on how to shoot and edit video in VR to show what you need to know if you are interested in doing this type of filming for remote teaching.
Tips for VR Filming
- Minimize movement. While the camera has built in stabilization, the stabilization is not as good as simply mounting the camera on a tripod or pole. If you do need to move the camera, do so very slowly and as smoothly as possible. Moving the camera quickly will cause your viewer to feel sick very quickly.
- Use a pole or tilt your tripod forward. Since VR filming captures a 180-degree sphere in front of the camera, you can see the tripod in the shot if set up normally. You either want to mount the camera to a pole or tilt the front two legs forward on the tripod to minimize what you will see in the shot
- Set the camera height to you’d expect your viewer’s eyelevel to be. If your viewer would sit at a bench to work on a trainer, sit at that bench and set the camera height to be where your eyelevel would be at that bench. This will give it a more realistic feel when viewing it in VR. Your viewer’s head would never be in the top corner of a room, so don’t put your camera there.
- Don’t tilt the camera down. Again, we are capturing a full 180-degree sphere in VR in front of the camera. Tilting the camera down will cause an odd feeling for the wearer. They will be able to tilt their head down in the VR headset
Once you capture all your shots, you need to edit them. The best way to do this is in Adobe Premiere Pro.
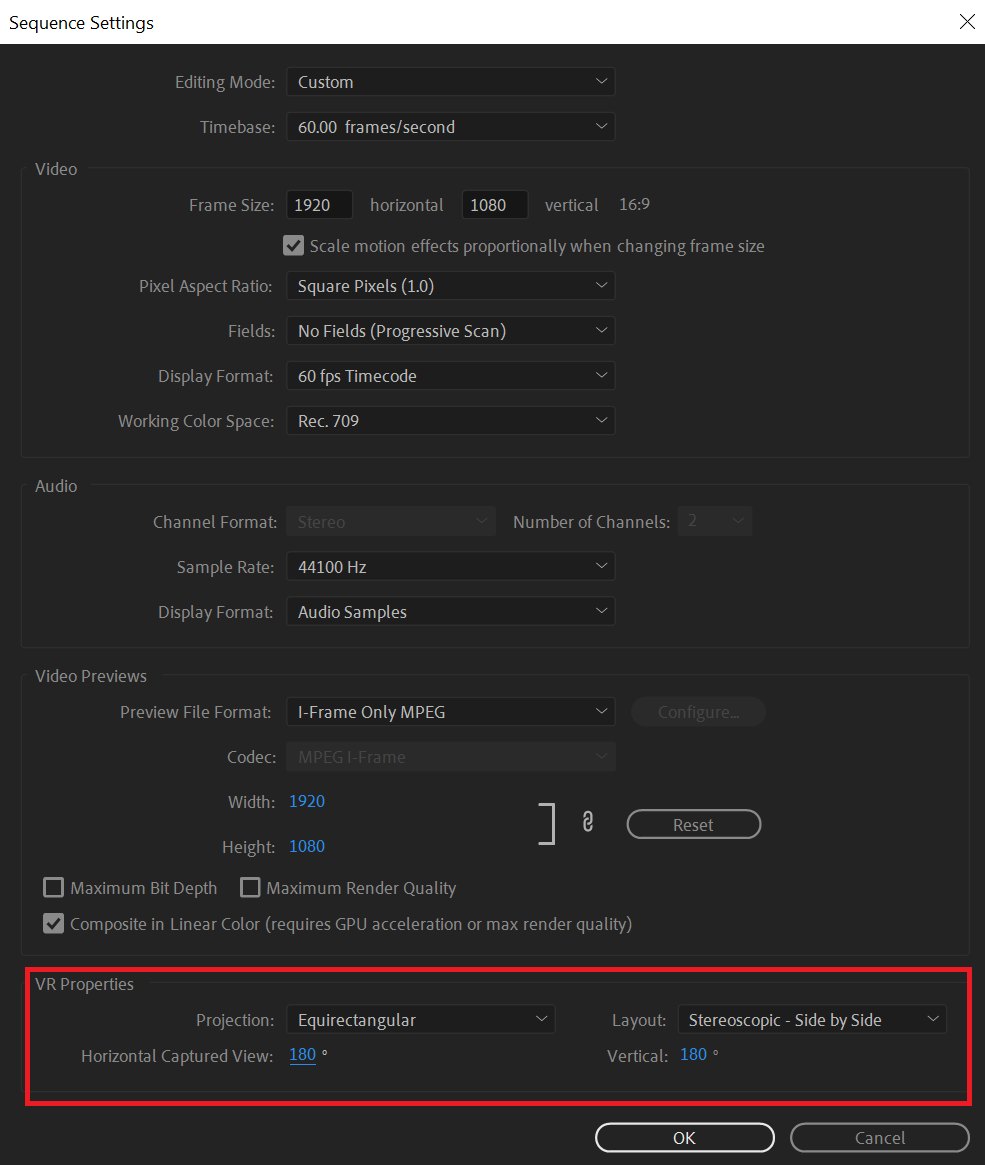
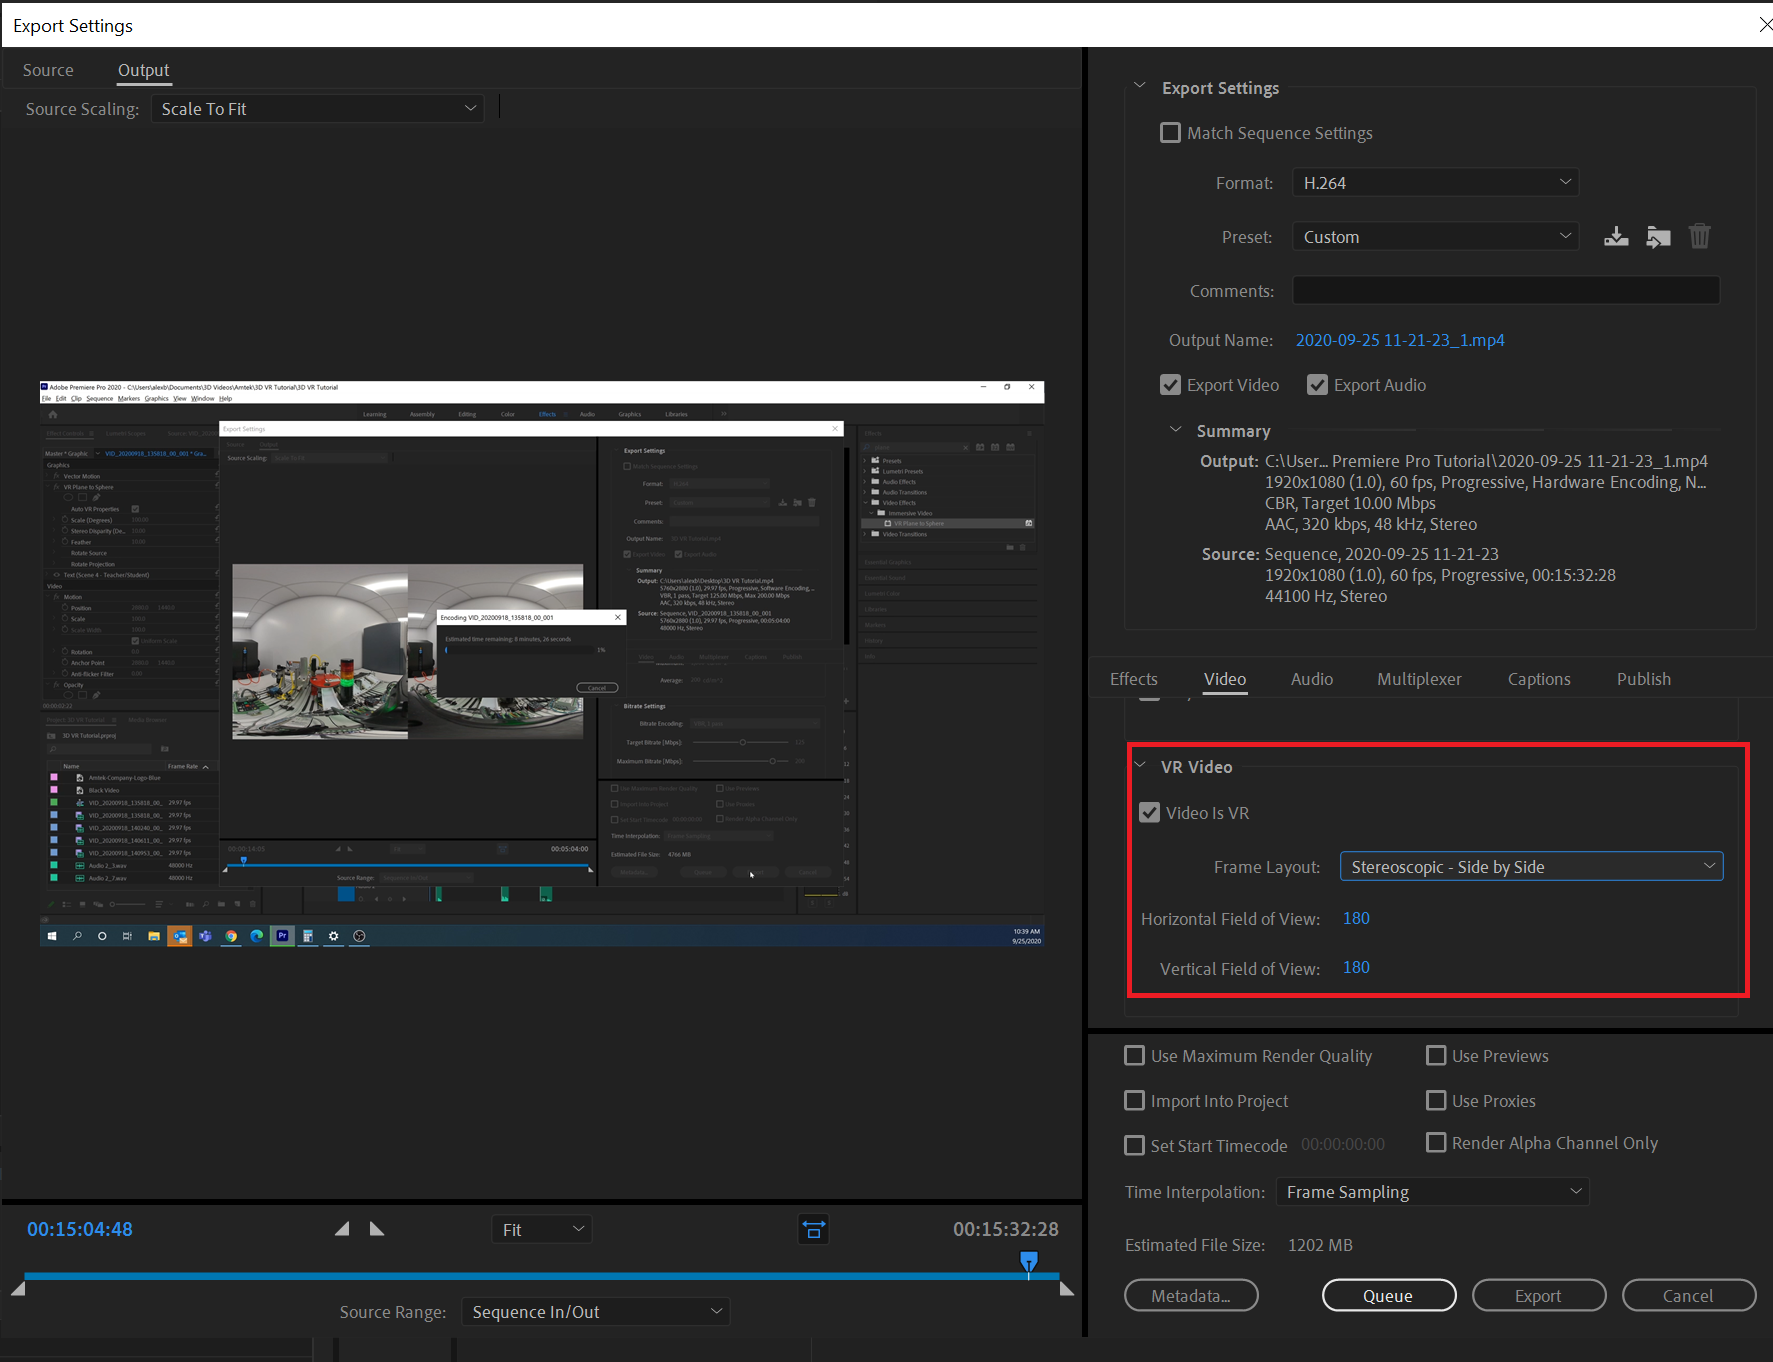
While most of the process of editing in Adobe Premiere Pro is the same as editing 2D video, there are two critical settings to get YouTube to recognize VR Video:


After you edit and upload your videos it will take YouTube some time to process them. While a low-resolution version will be available relatively quickly, it is not uncommon for this to take a few hours to completely process. Once this is done, you can view your VR videos in any VR headset.
Potential Drawbacks of VR
While the possibilities and benefits of VR are great, it is not without caveats. Some of the major issues with VR include:
- 3D VR cameras are expensive. Even the consumer grade Insta360 EVO is a $420 camera. Higher end cameras can be $5-$15K
- 3D VR filming creates massive files even for short scenes. Generally, I find about 1 gig per minute of video. Larger files mean larger storage needs on the computer. Since there are two lenses, there are two large files for every scene shot.
- A high-end computer is needed for editing. Since the file sizes are so large, you need a computer with a high-end processor, graphics card, lots of ram, and a large hard drive.
- Adobe Premiere Pro is required for anything but very basic editing. While very basic editing can be done with the Insta360 Studio software, to really edit videos properly, you need Adobe Premiere Pro, which is not free.
- High Speed Internet needed for viewing. Large file sizes mean a lot of bandwidth is needed to view these videos over the internet. Not all students have high speed internet.
- VR Headset required for viewing. Viewing the videos requires the purchase of a viewing device. While mini VR glasses or Google Cardboard can be purchased for under $10, for the most immersive experience you need a VR headset, the cheapest of which are still hundreds of dollars.
- You only can wear a headset for short periods. The headsets, while relatively light, still start to feel heavy over time. They also tend to fog up easily. Some users also start to feel a little queasy after a while.
While the list of issues is extensive, I still think it is worth exploring how this technology can be used for more immersive distance learning for hands on subjects. As is the case with all technology, it will get better and cheaper as time goes on.
To view all the videos in this tutorial as well as a number of example VR videos we’ve shot, take a look at our 3D VR Video Tutorials and Demonstrations playlist or watch it below.
Are you using VR as part of your remote teaching efforts? Tell us how in the comments below.


